> ## Documentation Index
> Fetch the complete documentation index at: https://docs.k9traininglog.com/llms.txt
> Use this file to discover all available pages before exploring further.
# Using K9 Training Log with GPS Data
## 1. Document your training with the CalTopo app
Use the CalTopo mobile app to record time, location, and track data while you're training.
**Why use CalTopo instead of a dedicated training app that records tracks?**
* CalTopo is becoming a standard mapping tool for SAR teams across the country. Just as we train like we deploy in K9 work, using CalTopo during training builds familiarity and makes it easier to use effectively on real missions.
* CalTopo supports real-time collaboration between handlers and subjects on both iOS and Android, without the need to send GPX files back and forth.
**What if my team doesn't use CalTopo?** \
You can still use K9 Training Log with any GPS recording app that exports GeoJSON or GPX files. For Apple Watch users, we recommend WorkOutdoors, a simple GPS tracking app for recording training routes. You can also create K9 Training Log records manually, without GPS data.
### GPS for Detection Exercises
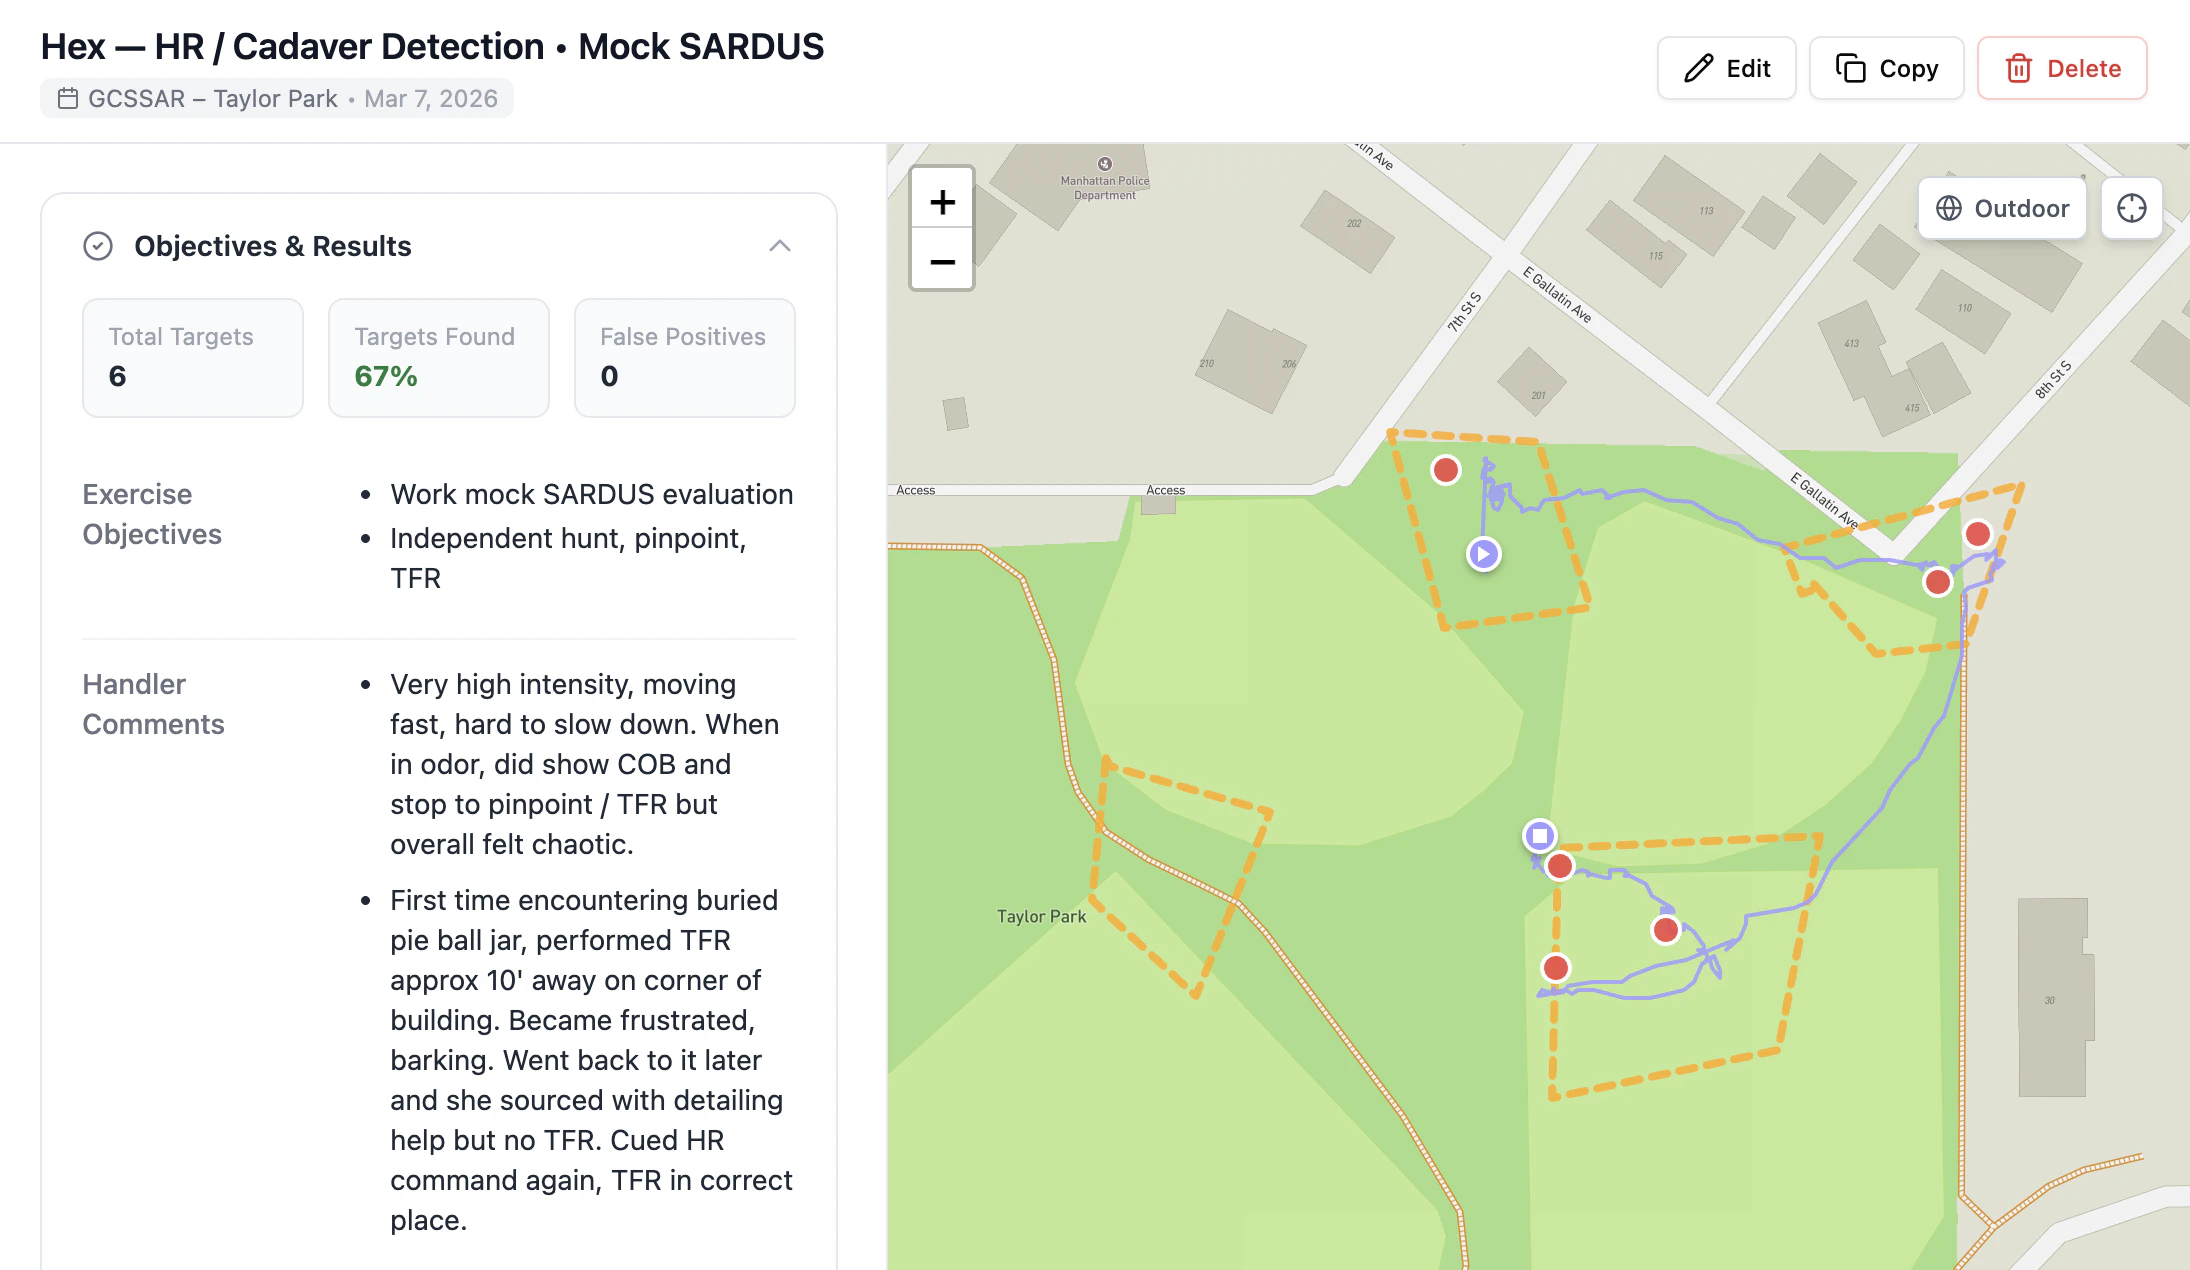
Use the CalTopo mobile app to easily record and pre-fill your logs with the following info:
* **Training aid placement**\
Mark a waypoint when you place a training aid. The timestamp, gps coordinates, and any comments you make will be automatically imported.
* **Your track**\
Record your track while working each exercise. Your start time and working duration will be automatically calculated and imported.
* **Search area boundaries**\
Add area boundaries to automatically calculate the size of your search areas.
 ### GPS for Tracking/Trailing exercises
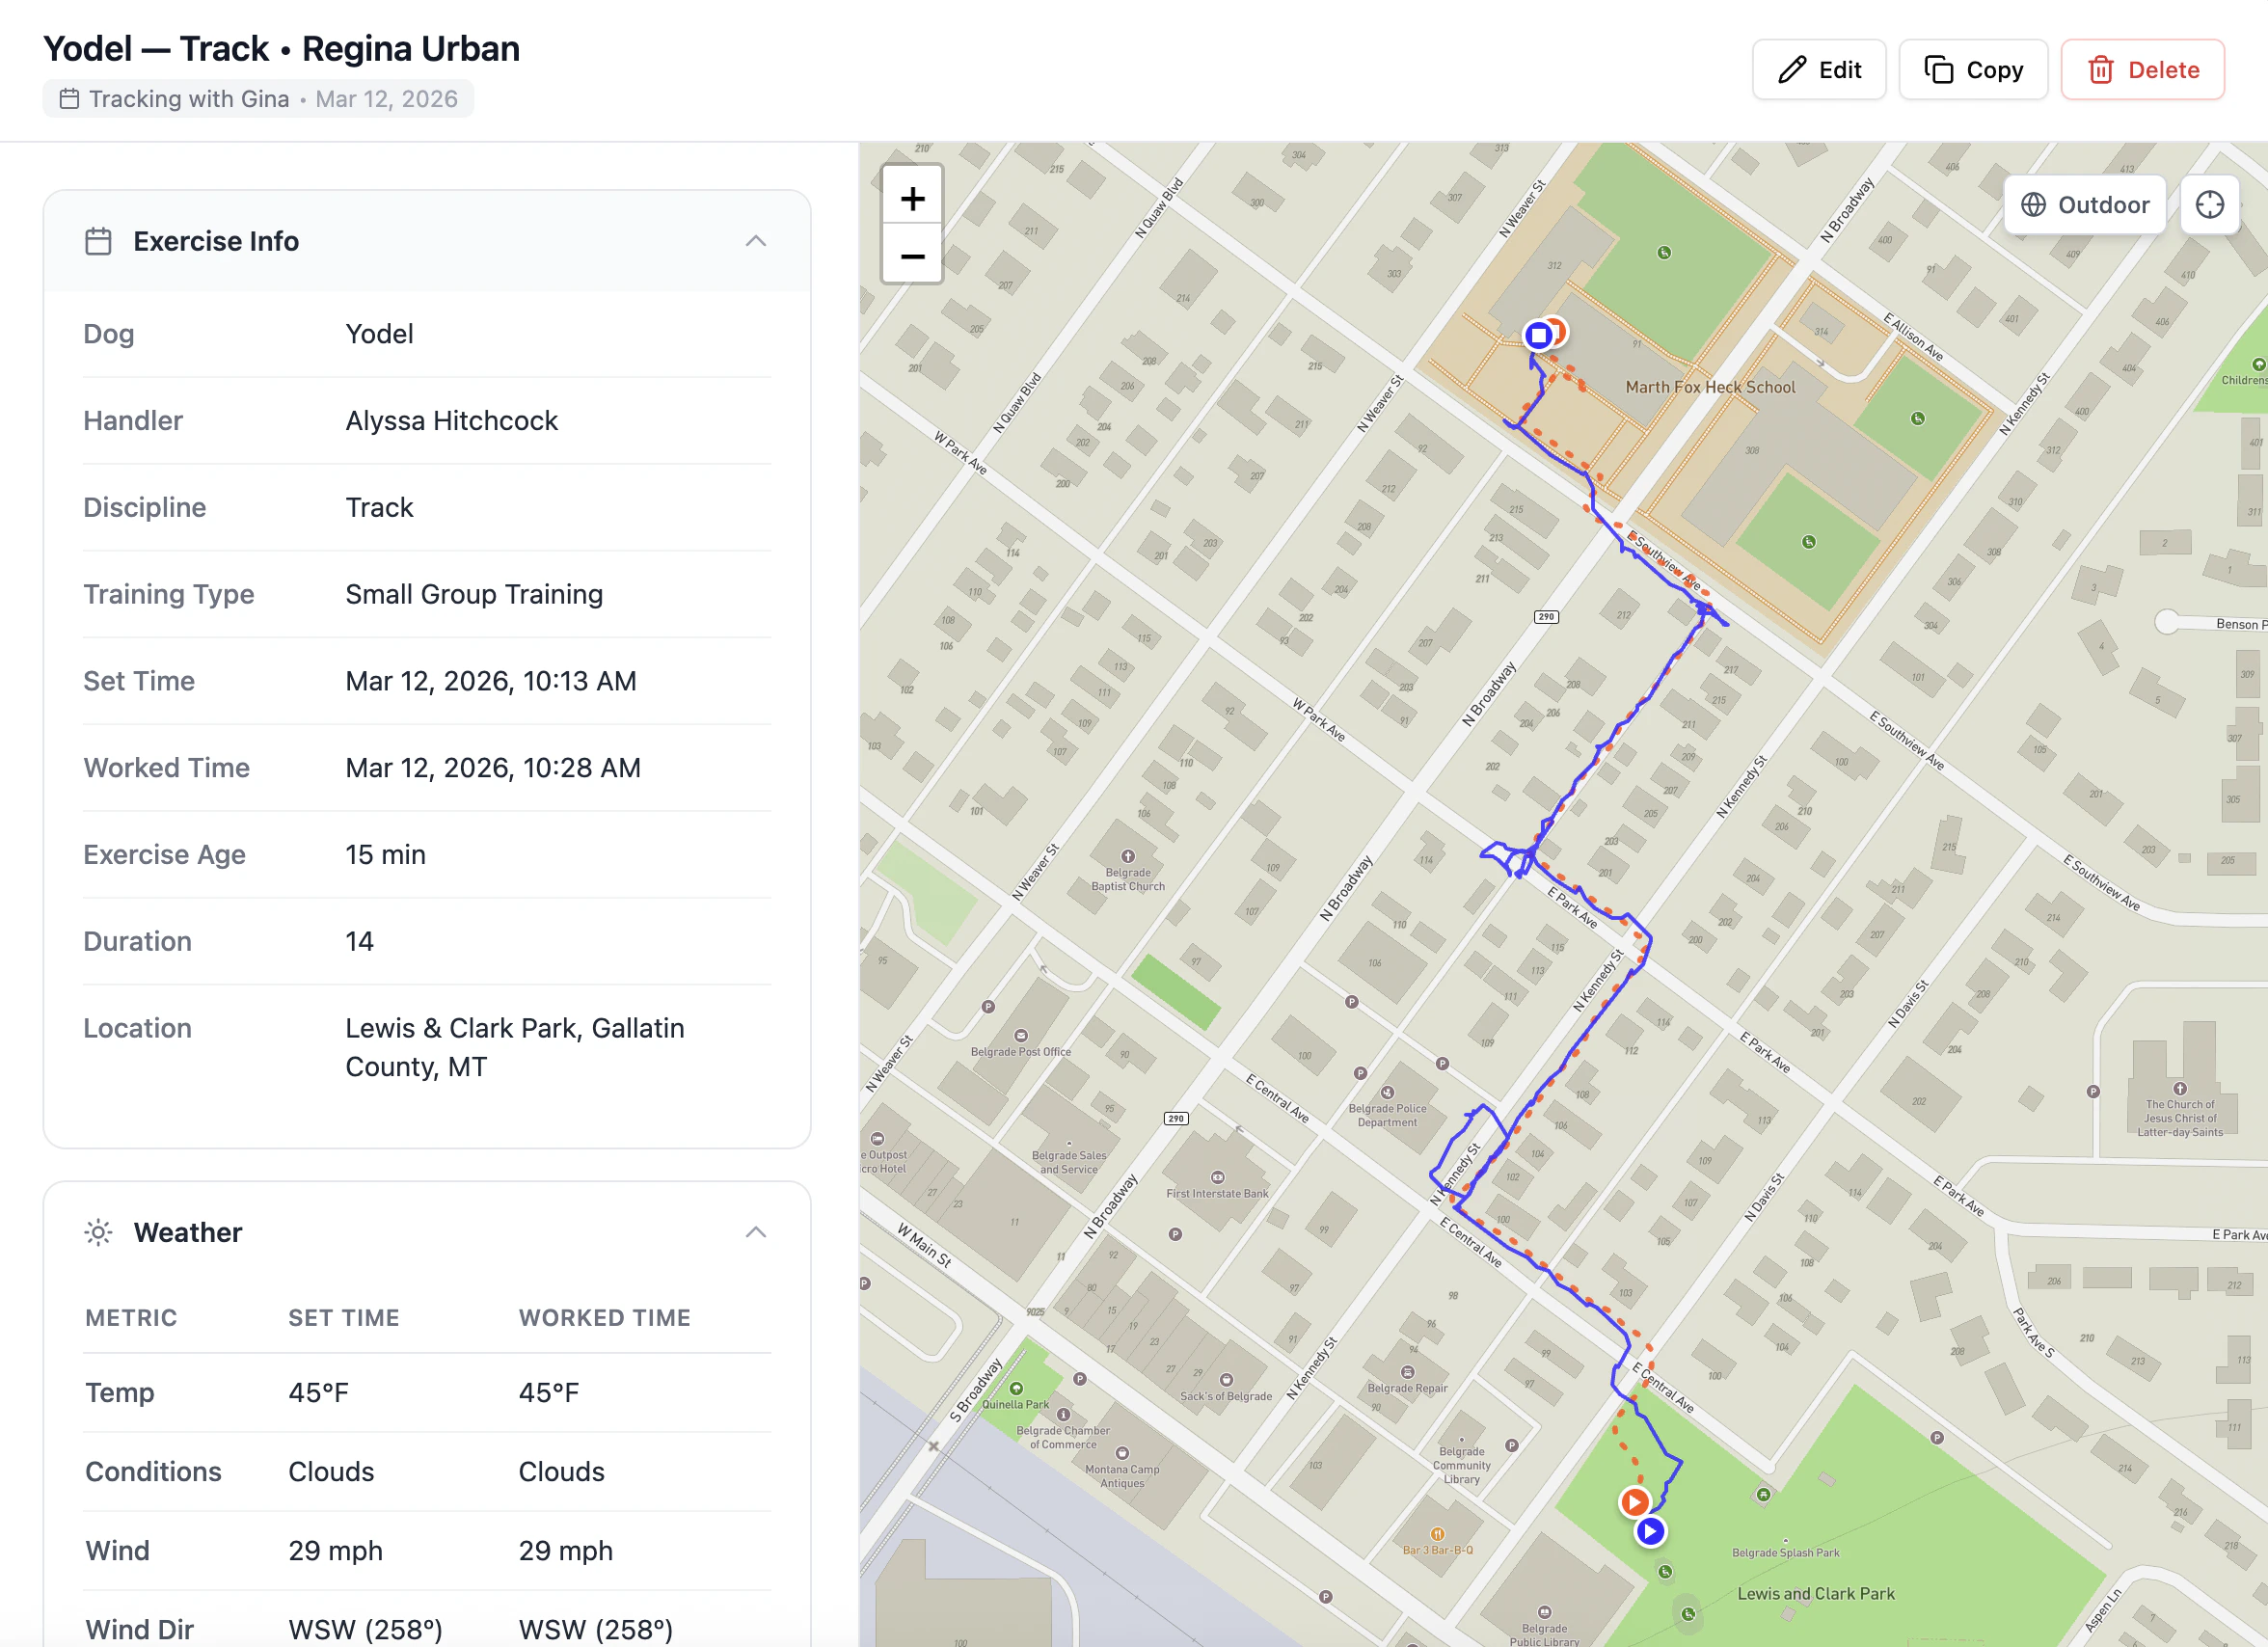
Use the CalTopo mobile app to easily record and pre-fill your logs with the following info:
* **Runner track**\
Have your subject record their track to gather set time + runner distance. Bonus – it's automatically available on your map, eliminating the need to send GPX tracks back and forth.
* **Your track**\
Record your track to gather worked time, duration, dog distance
***If both tracks are available,***\_ K9 Training Log will also calculate \_***max distance off track***
### GPS for Tracking/Trailing exercises
Use the CalTopo mobile app to easily record and pre-fill your logs with the following info:
* **Runner track**\
Have your subject record their track to gather set time + runner distance. Bonus – it's automatically available on your map, eliminating the need to send GPX tracks back and forth.
* **Your track**\
Record your track to gather worked time, duration, dog distance
***If both tracks are available,***\_ K9 Training Log will also calculate \_***max distance off track***
 **Prefer not to record tracks in CalTopo?**\
If your smartwatch can record a GPS track, you can capture the track there and then either import it into **CalTopo** before exporting, or upload it directly to K9 Training Log. For Apple Watch users, the **WorkOutdoors app** is a great option that makes it easy to record tracks, mark waypoints, and export the data to your phone.
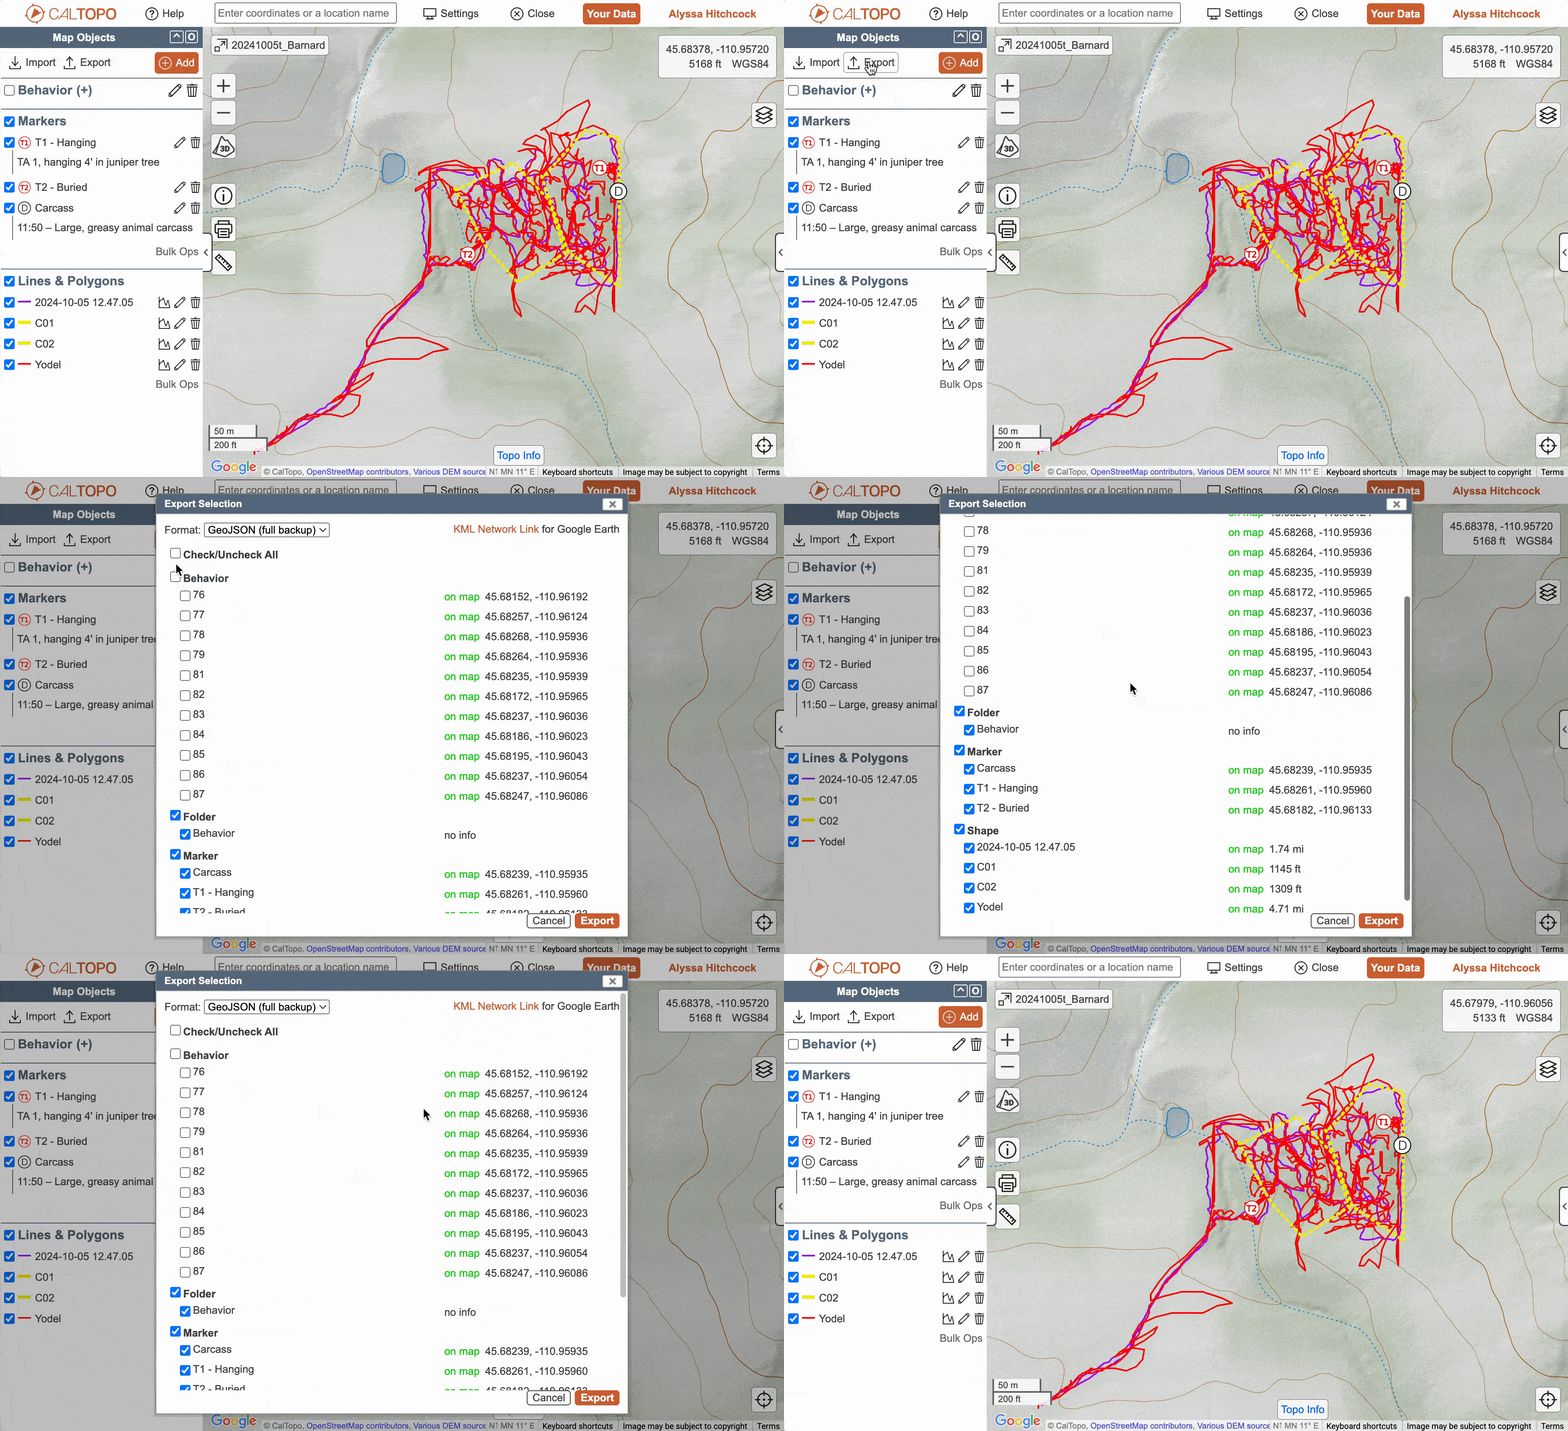
## 2. After training, review and export your CalTopo map
Click **Export** in the top left corner of the screen, select the data you want to import into your training log, and click **Export** in the bottom right
**Prefer not to record tracks in CalTopo?**\
If your smartwatch can record a GPS track, you can capture the track there and then either import it into **CalTopo** before exporting, or upload it directly to K9 Training Log. For Apple Watch users, the **WorkOutdoors app** is a great option that makes it easy to record tracks, mark waypoints, and export the data to your phone.
## 2. After training, review and export your CalTopo map
Click **Export** in the top left corner of the screen, select the data you want to import into your training log, and click **Export** in the bottom right
 ## 3. Create your training log & import your file
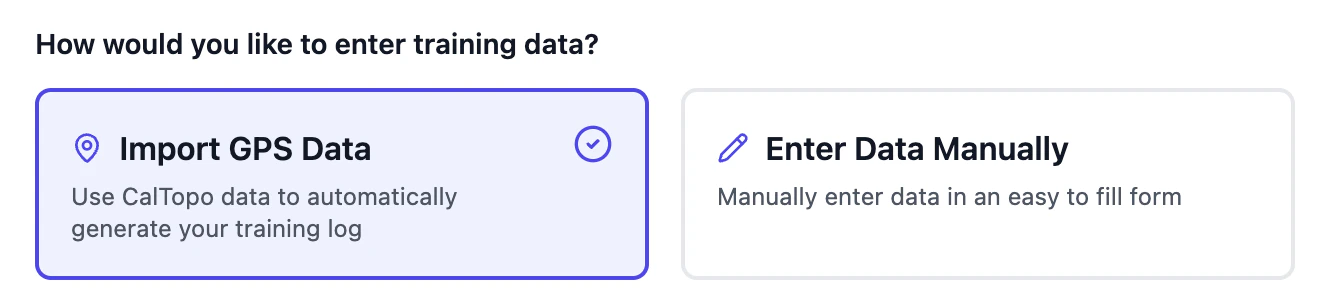
Open your training event and click **New Exercise.** At the bottom of the Exercise Info section, select **Import GPS Data**
## 3. Create your training log & import your file
Open your training event and click **New Exercise.** At the bottom of the Exercise Info section, select **Import GPS Data**
 ## 4. Drag & drop or browse to your downloads to find your JSON file
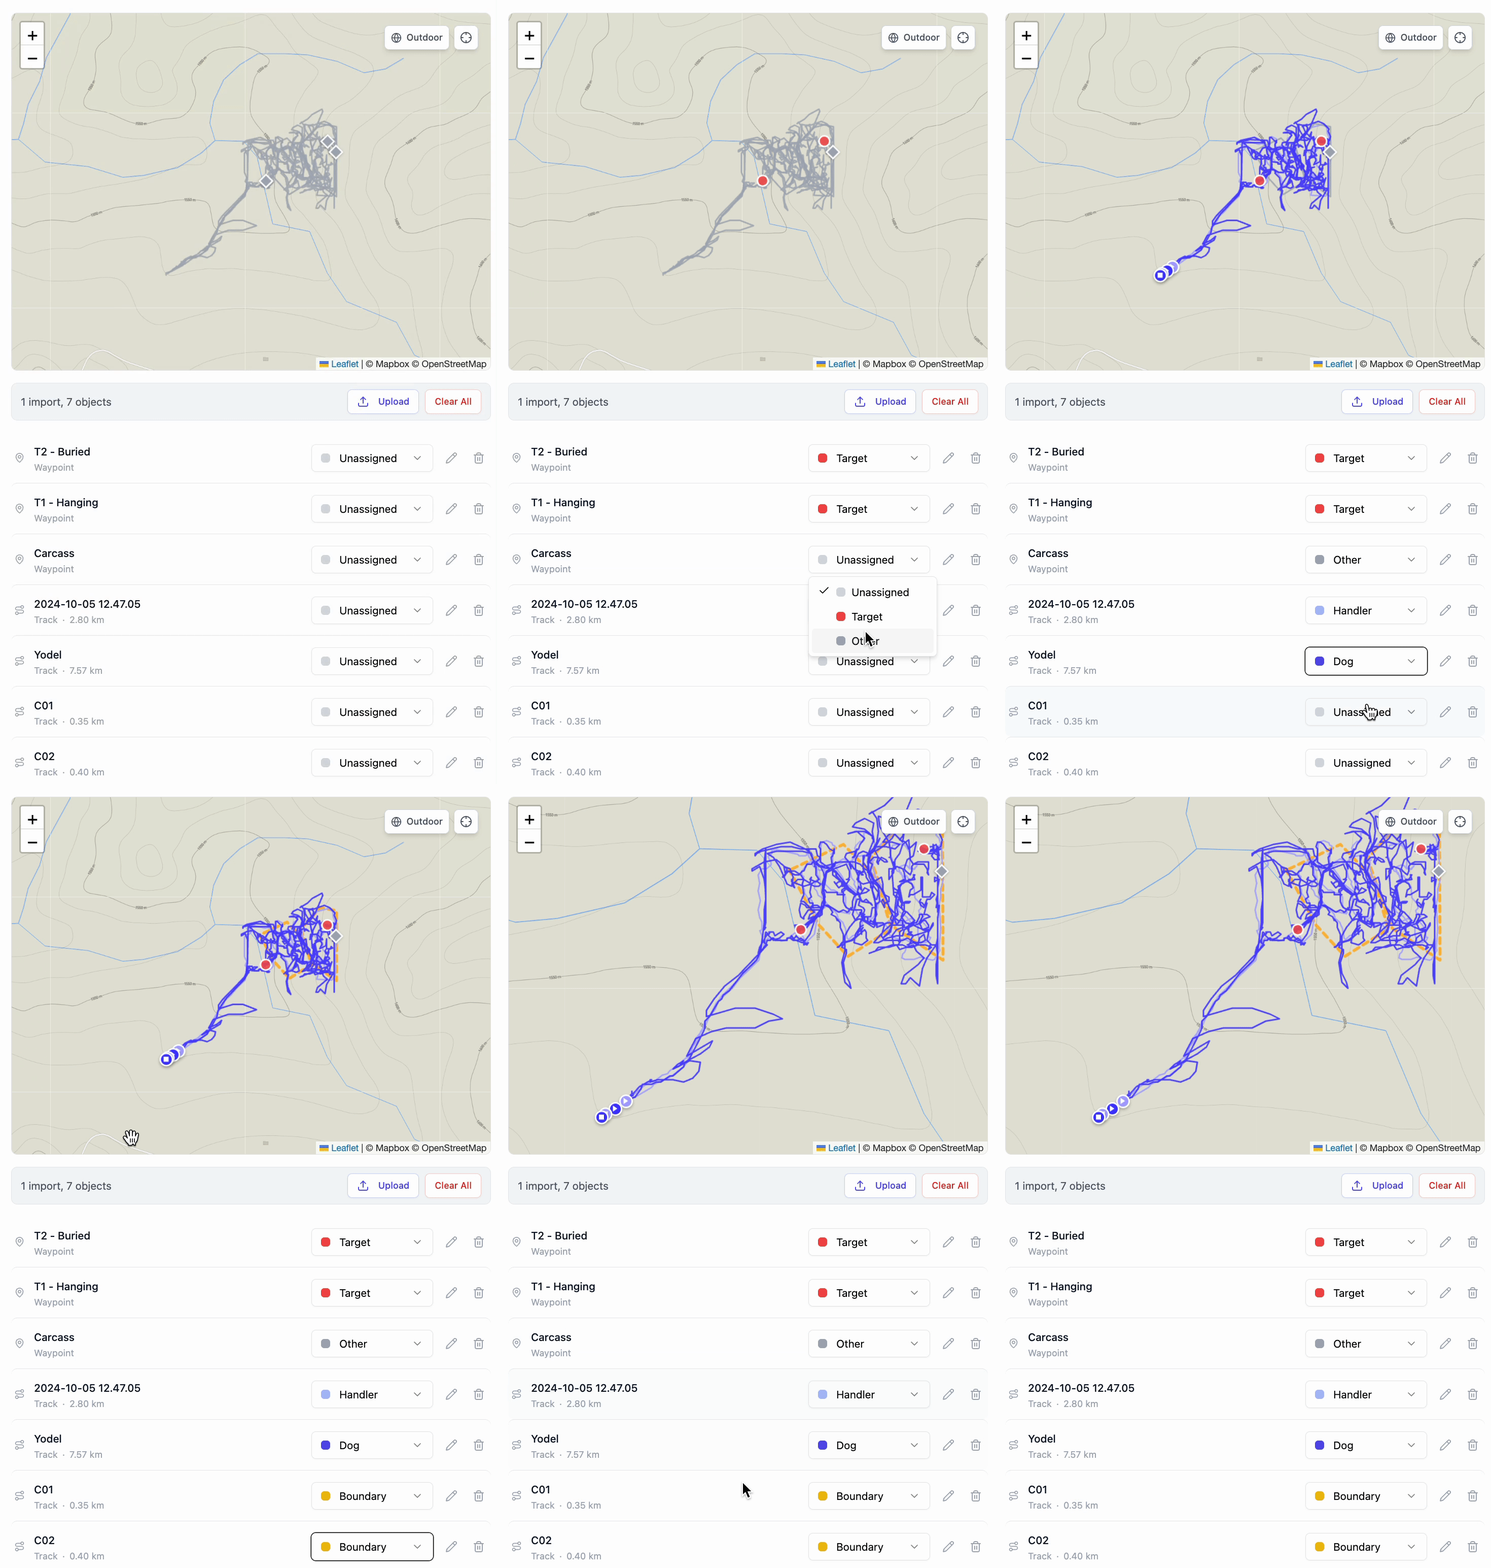
## 5. Assign roles to each GPS object
## 4. Drag & drop or browse to your downloads to find your JSON file
## 5. Assign roles to each GPS object
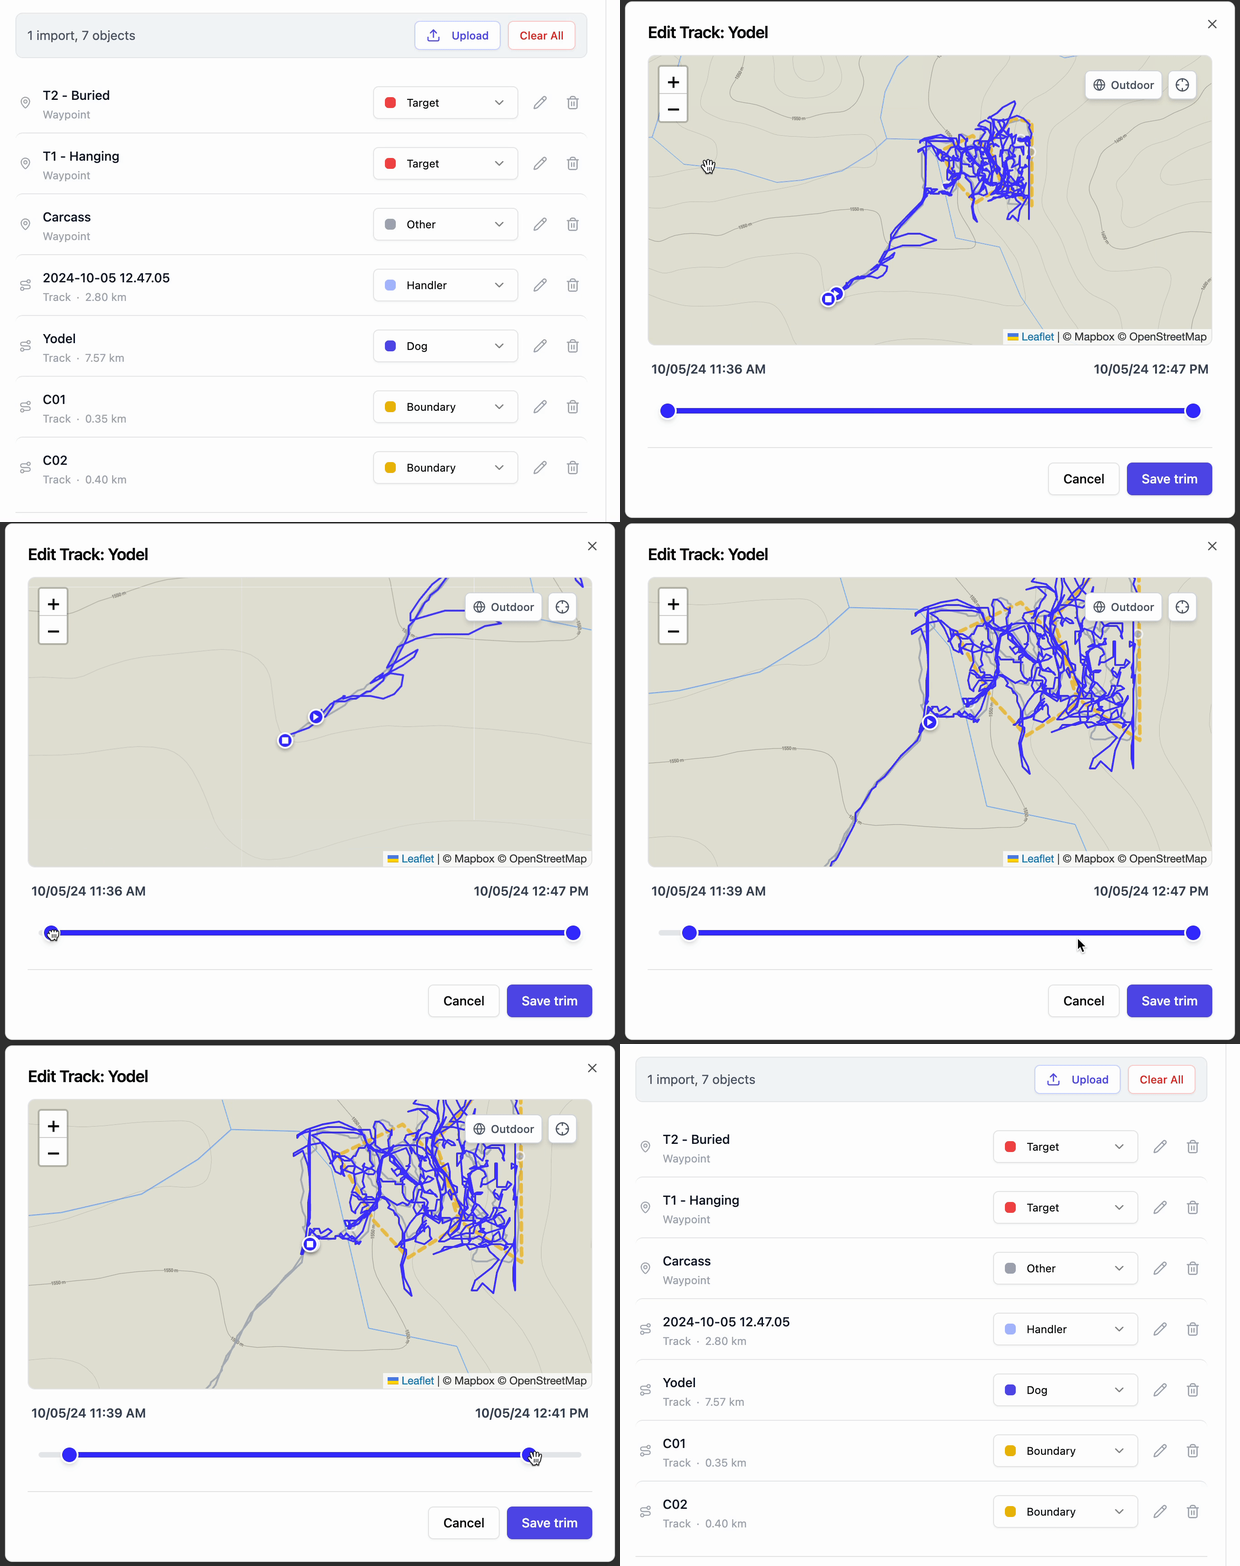
 ## 6. Optional: Trim tracks
Click the **pencil icon** next to a track to adjust the start / end position, which will automatically adjust the start and end time of the track.
## 6. Optional: Trim tracks
Click the **pencil icon** next to a track to adjust the start / end position, which will automatically adjust the start and end time of the track.
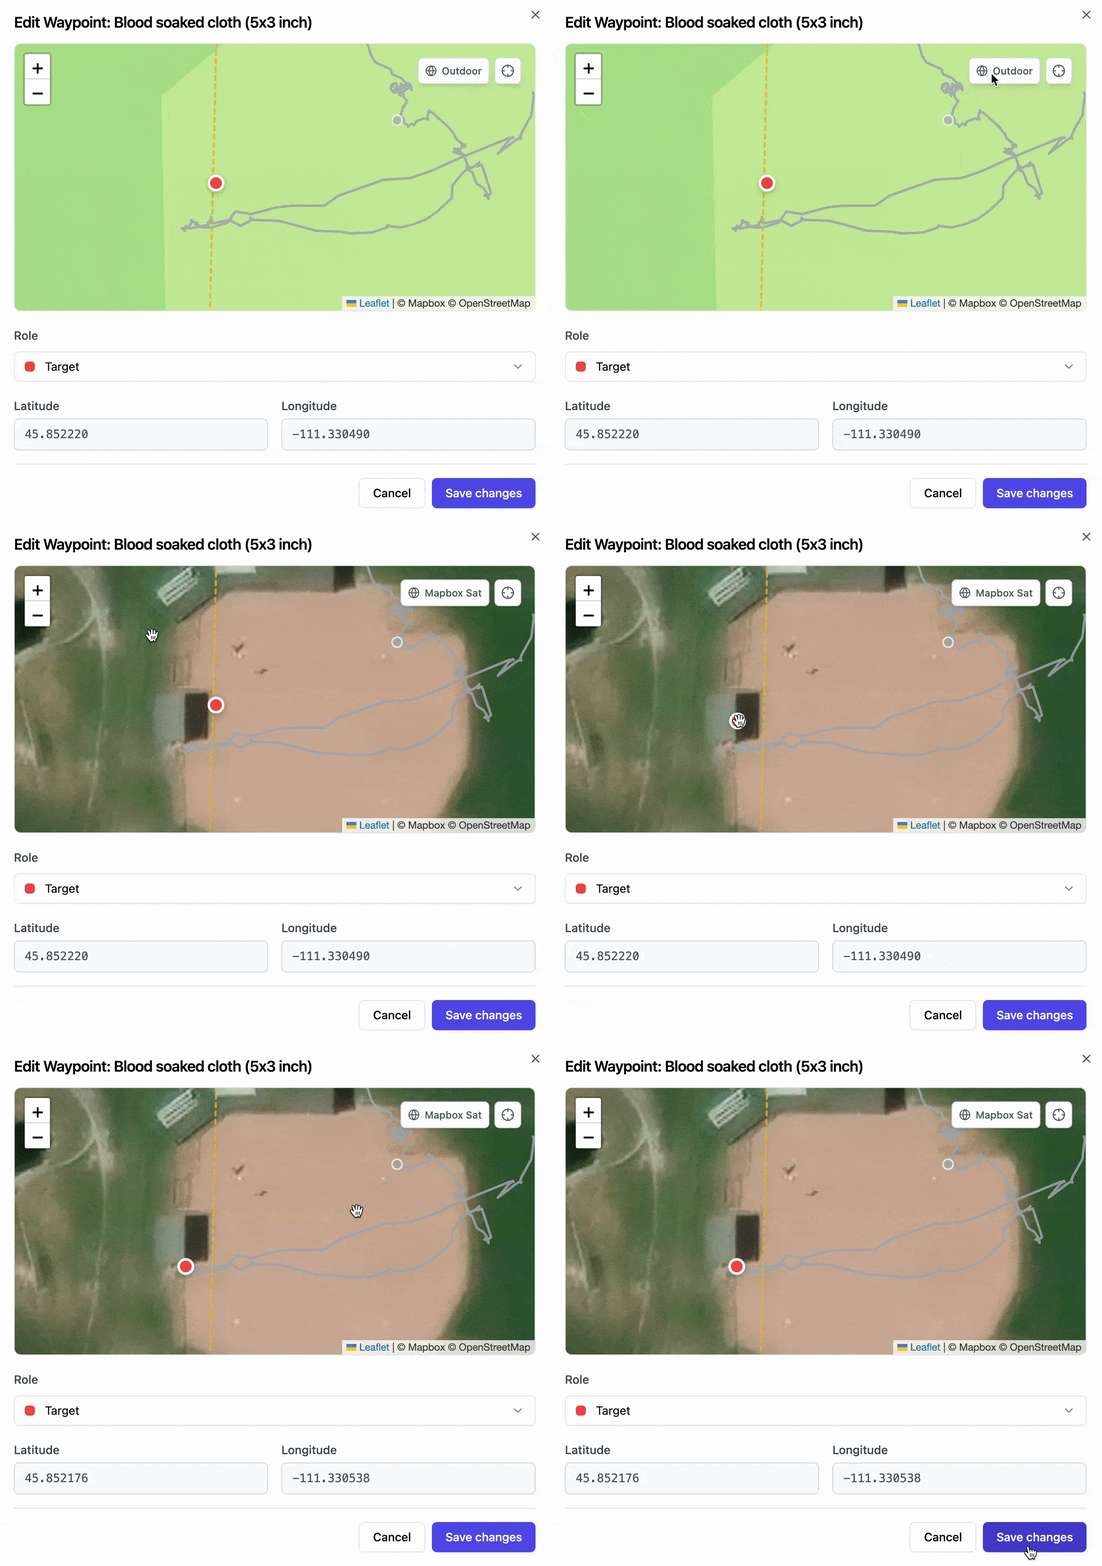
 ## 7. Optional: Edit Waypoint position
Click the **pencil icon** next to a waypoint to adjust the position.
## 7. Optional: Edit Waypoint position
Click the **pencil icon** next to a waypoint to adjust the position.
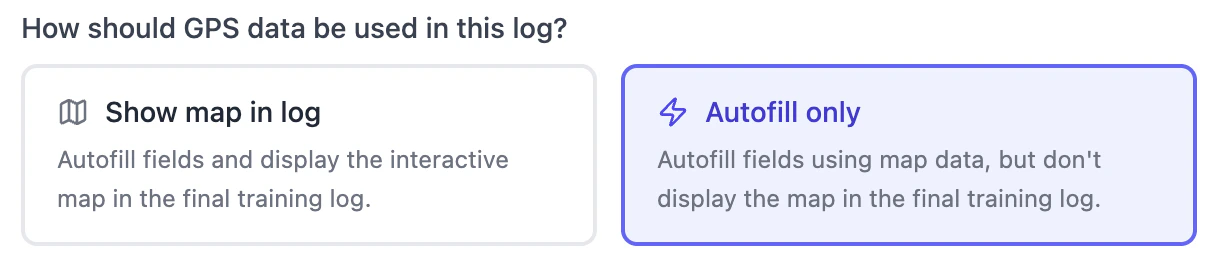
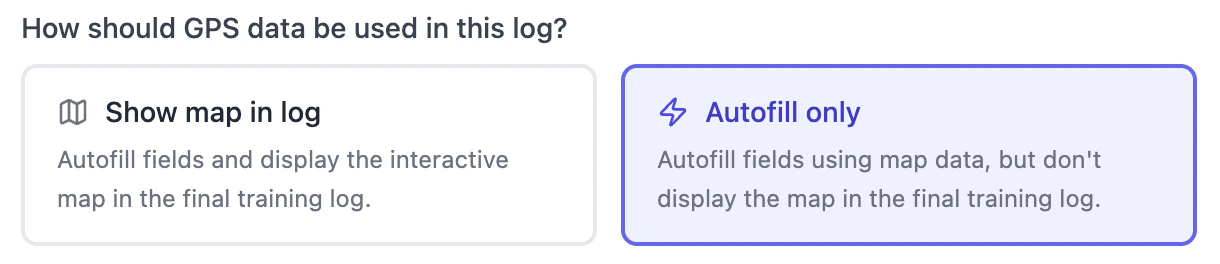
 **What does "Autofill Only" mean?**\
Use **Autofill only** when GPS data is helpful for populating your log, but the map itself is not useful to display. This is often the case for small indoor drills, where the track may appear as overlapping lines with little review value.
Even without showing the map, a recorded track can still provide useful details like weather location, start time, and working duration.
We recommend using a lightweight GPS watch or tracking app to capture these sessions. For Apple Watch users, [**WorkOutdoors**](http://www.workoutdoors.net/) is a great option, but any app or device that can export a GPX file will work.
**What does "Autofill Only" mean?**\
Use **Autofill only** when GPS data is helpful for populating your log, but the map itself is not useful to display. This is often the case for small indoor drills, where the track may appear as overlapping lines with little review value.
Even without showing the map, a recorded track can still provide useful details like weather location, start time, and working duration.
We recommend using a lightweight GPS watch or tracking app to capture these sessions. For Apple Watch users, [**WorkOutdoors**](http://www.workoutdoors.net/) is a great option, but any app or device that can export a GPX file will work.
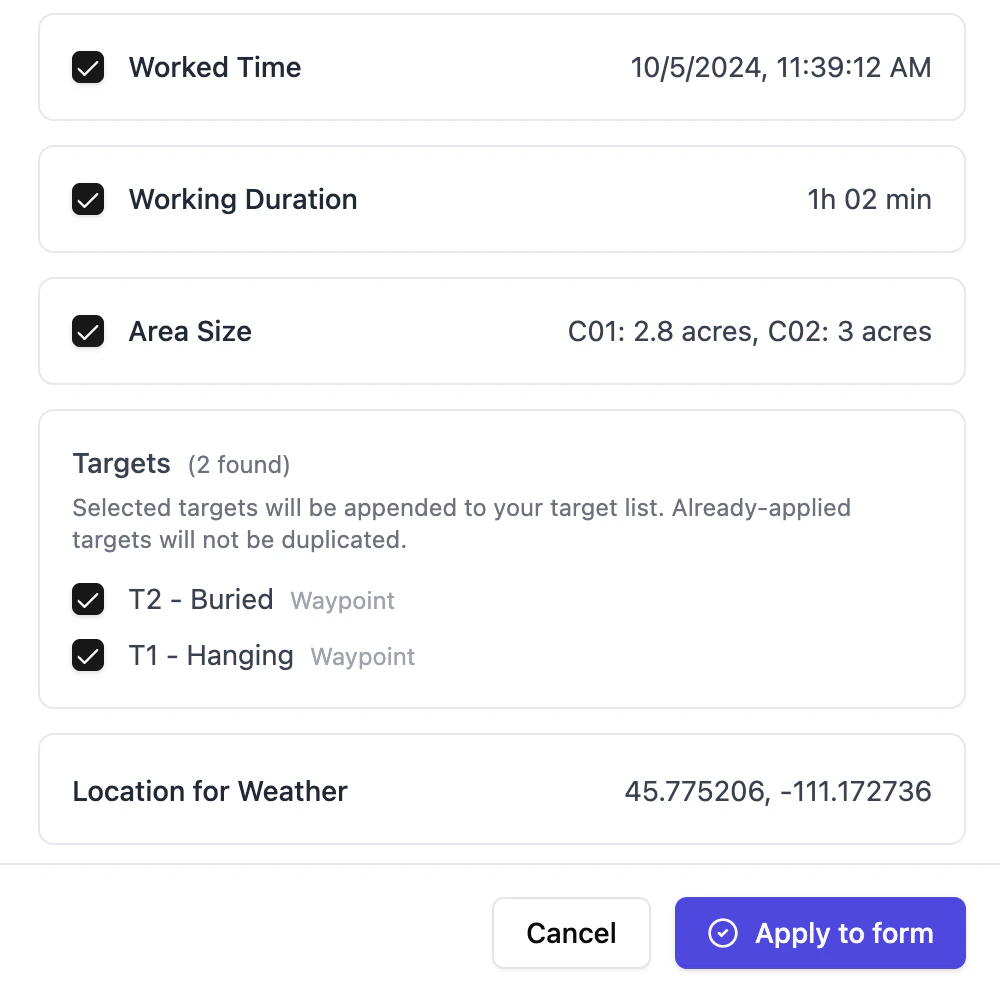
 ## 8. Click Analyze to preview the data
If there's anything you don't want added to the form, just **uncheck the box.**
## 8. Click Analyze to preview the data
If there's anything you don't want added to the form, just **uncheck the box.**
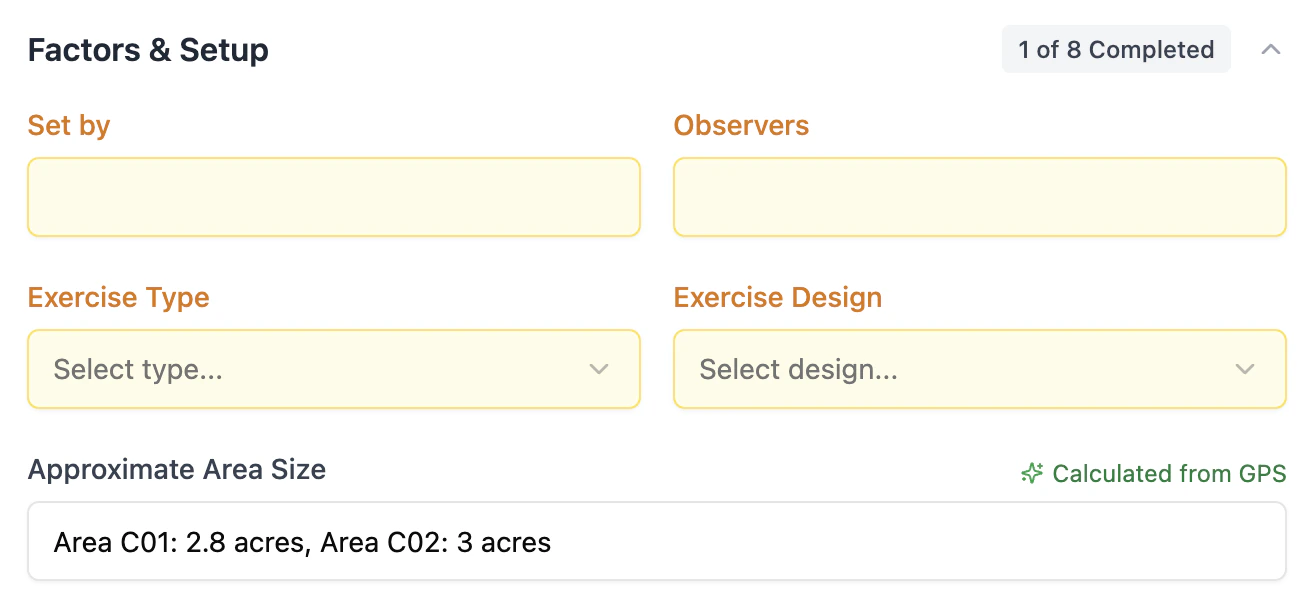
 ## 9. Fill out the rest of the form
Everything prefilled from GPS will show a green **Calculated from GPS** badge. All fields that still need your input will be **highlighted in yellow.**
## 9. Fill out the rest of the form
Everything prefilled from GPS will show a green **Calculated from GPS** badge. All fields that still need your input will be **highlighted in yellow.**
 ## Other GPS Questions
### What does "**Autofill Only"** mean?
Use **Autofill only** when GPS data is helpful for populating your log, but the map itself is not useful to display. This is often the case for small indoor drills, where the track may appear as overlapping lines with little review value.
Even without showing the map, a recorded track can still provide useful details like **weather location, start time, and working duration**.
We recommend using a lightweight GPS watch or tracking app to capture these sessions. For Apple Watch users, [**WorkOutdoors**](http://www.workoutdoors.net/) is a great option, but any app or device that can export a **GPX** file will work.
## Other GPS Questions
### What does "**Autofill Only"** mean?
Use **Autofill only** when GPS data is helpful for populating your log, but the map itself is not useful to display. This is often the case for small indoor drills, where the track may appear as overlapping lines with little review value.
Even without showing the map, a recorded track can still provide useful details like **weather location, start time, and working duration**.
We recommend using a lightweight GPS watch or tracking app to capture these sessions. For Apple Watch users, [**WorkOutdoors**](http://www.workoutdoors.net/) is a great option, but any app or device that can export a **GPX** file will work.